In this article
Painting over old gloss looks straightforward and catches people out. You brush a fresh coat onto a shiny skirting board, it goes on beautifully, and a fortnight later it is peeling off in sheets. It is the single most common reason we get called out to redo someone's woodwork, and the cause is almost always the same: the old gloss was never keyed or cleaned properly first.
The good news is that it is well within reach of a careful homeowner. Below our painters walk through how we do it on Surrey homes every week: keying, sanding versus deglosser, degreasing, primer choice, the drying times and conditions that matter, and getting your topcoat on so it actually lasts.
Why gloss has to be keyed first
Gloss paint cures to a hard, slick, almost glassy film. That is exactly what makes it wipe-clean and durable on skirtings and doors, but it is also the problem when you want to repaint. Fresh paint needs a slightly rough, open surface to grip onto. Brush a new coat onto untouched gloss and it is essentially sitting on glass, and it will chip, peel or scratch at the first knock. Modern water-based trim paints have even less natural bite on old gloss than the oil paints of twenty years ago, so preparation matters more than ever.
Two things solve this: dulling the surface so the new paint has a mechanical key, and cleaning off the grease and grime that paint will never stick to however well you sand. Get both right and everything else is easy; skip either and even the most expensive paint will fail.
First, check whether the old gloss is oil-based or water-based
Before you buy anything, spend two minutes working out what is already on the woodwork, because it decides your primer. Dampen a cotton wool ball with methylated spirits and rub it firmly on an out-of-the-way patch for ten seconds. If colour lifts onto the cotton and the surface goes tacky, the existing paint is water-based; if the cotton stays clean, you are looking at oil-based gloss.
Age is a strong clue too: white woodwork that has yellowed to a creamy tone is almost certainly oil-based, and most trim painted before around 2010 will be, as that is when tighter solvent rules pushed the trade towards water-based products. It matters because water-based paint brushed directly over oil-based gloss is the classic peeling failure. Whenever you are switching from oil to water-based, which most repaints now are, an adhesion primer between the two is cheap insurance our painters never skip.
The kit our painters actually use
You do not need a van full of gear. For a typical door-and-frame job we would take:
- Abrasives: 120 grit paper or a medium sanding sponge for the main keying, 180 grit for smoothing, and 240 grit for the light rub between coats.
- Sugar soap, two buckets (one to wash, one to rinse), lint-free cloths and a tack cloth for the final dust-off.
- Low-tack masking tape and dust sheets; sanded gloss makes a fine dust that travels.
- A 2 inch (50 mm) synthetic brush for water-based paint and a 1 inch angled sash brush for mouldings; natural bristle lays off oil-based paint more smoothly.
- A 4 inch mini roller with a short-pile (4 to 6 mm) microfibre or foam sleeve for flat door panels: roll the paint on, then lightly brush it out (laying off) for a smooth finish without stipple.
- Primer and topcoat. As a guide, most trim paints cover 12 to 16 m² per litre per coat, so a 750 ml tin comfortably does the woodwork of an average room twice over.
Option one: sanding (the tried and tested method)
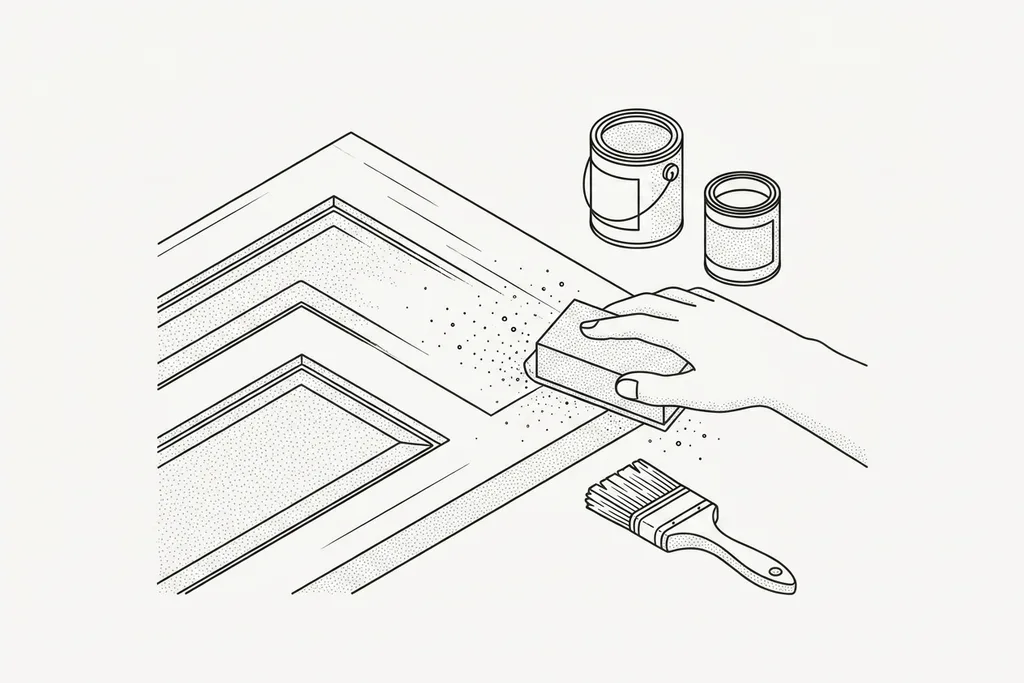
Sanding is still the method we trust most. You are not stripping the gloss back to bare wood, just knocking the sheen off until the whole surface looks uniformly dull and matt, with no shiny islands anywhere.
- Use 120 grit for the main keying, following with 180 grit if the surface feels rough. Anything coarser than 100 grit leaves scratch marks that telegraph through the finish.
- Sand in the direction of the grain, working methodically: any spot that stays shiny is a spot where the new paint will not bond.
- On mouldings and panelled doors, a folded piece of paper or a sanding sponge gets into profiles a flat block cannot reach.
- On long runs of skirting or a full staircase, an orbital sander with 120 grit discs saves hours; hand-sand the last inch into corners and keep it moving so you do not rub through on sharp edges.
- Wipe away all the dust afterwards with a slightly damp cloth or a tack cloth. Sanding dust is a bonding barrier just like grease.
A word on lead. In properties built before the late 1970s the original paint layers may contain lead, and dry-sanding releases harmful dust. We treat this seriously in older Surrey homes: wet-sanding with wet-and-dry paper, properly rated masks, no power sanders, and careful clean-up. If in doubt, this is one job genuinely worth handing to a professional.
Option two: liquid sander or deglosser
If the thought of sanding an entire staircase of spindles fills you with dread, a liquid sander (also sold as a deglosser) is a legitimate alternative: a solvent-based product you wipe on with a cloth that chemically dulls the top of the gloss so the new paint can grip, without the dust.
We find it genuinely useful on intricate mouldings and fiddly carved detail where sandpaper cannot reach every corner. Wipe it on with a lint-free cloth, wear nitrile gloves, and keep windows open because the fumes are strong. It is not magic, though: it works best on gloss that is already sound, and you must follow the dwell and recoat times on the tin to the letter, as many products want the topcoat applied within a stated window while the surface is still receptive. For flat runs of skirting, honest sanding is quicker and more dependable.
Can you paint over gloss without sanding?
This is the question we are asked most, and the honest answer is: sometimes, with the right product. Brushing straight over gloss with ordinary paint does not work and never did, but there are now no-sand bonding primers formulated specifically to key chemically to glossy, slick surfaces without abrasion.
If sanding truly is not practical, this is the route we would trust over any "paint straight over it" shortcut. Even so, you must still degrease first, because no primer sticks to greasy woodwork, and a quick scuff with a fine abrasive pad noticeably improves the bond for very little effort. So "without sanding" in practice means "with a light scuff and a proper bonding primer" rather than doing nothing at all.
Degreasing: the step everyone forgets
Whether you sand, use a deglosser or reach for a bonding primer, cleaning the surface is non-negotiable. Woodwork accumulates an invisible film over the years: hand grease, cooking residue, furniture polish and household dust. Paint will not bond to any of it.
- Wash the surface down with sugar soap and warm water, following the dilution on the pack; warm water cuts through grease that plain water simply smears around.
- Work with two buckets, one to wash and one to rinse with clean water: sugar soap residue left behind can itself interfere with the new paint.
- Pay special attention to high-touch areas: door edges around handles, the tops of skirtings, banister rails, and anywhere near a hob or bathroom sink.
- Let everything dry fully before you prime: a couple of hours in a warm room, longer in an unheated hallway in winter. Trapped moisture is another common cause of adhesion failure.
On a sanding job we degrease after sanding, lifting dust and grease in one go; with no sanding, degreasing does even more of the work, so do not rush it.
Choosing the right primer
Once the surface is keyed and clean, a primer or undercoat gives your topcoat the best foundation. If you are unsure of the difference, our guide to undercoat versus primer breaks it down properly; here is the short version for painting over gloss.
For a like-for-like refresh where the old surface is sound and well keyed, a good undercoat is often enough. Where you have skipped sanding, where you are putting water-based paint over old oil gloss, or where the surface is in any way suspect, a dedicated adhesion primer is the safer choice. Water-based adhesion primers are low-odour and typically recoatable in one to two hours. Shellac-based primers grip almost anything, dry in under an hour and block stains as a bonus, but the fumes are strong and brushes need methylated spirits to clean. Expect roughly 10 to 12 m² per litre from most primers; one even coat is usually enough unless you are hiding a strong colour.
Always spot-prime bare wood, using a knotting solution on resinous knots so they do not bleed brown stains through the new finish. Let the primer dry fully, leave it overnight when in doubt, and give it a very light key with 240 grit if it has dried glassy.
Painting over gloss with emulsion versus satinwood
What you are going over the gloss with changes the approach.
Emulsion over gloss
Occasionally people want to paint previously glossed panelling or a dado with ordinary matt emulsion. Emulsion has very little grip of its own, so brushing it straight onto gloss is a recipe for a flaky, patchy mess. Key and degrease as above, put down a bonding primer suited to going under emulsion, and only then apply the emulsion. Done properly it is fine; done as a shortcut it is one of the worst peelers we get called out to.
Satinwood or gloss over gloss
This is the far more common job: refreshing tired glossy woodwork, or switching to a softer modern satinwood finish, which has become the default on Surrey woodwork because it hides imperfections better than full gloss and does not yellow as noticeably. Water-based satinwood is touch dry in an hour or two and recoatable in four to six; it stays white for years but wants brisk, confident brushwork because it does not stay workable for long. Oil-based satinwood and gloss flow out beautifully and forgive a slower hand, but each coat needs overnight (sixteen hours or more) before recoating, and their whites slowly yellow in rooms with little daylight.
Whichever you choose, the prep is the same: key, degrease, prime or undercoat, then two thin topcoats rather than one thick one. Thin coats flow out better, sag less and cure harder. If you are set on a bright, traditional shine, our thoughts on choosing the best white gloss paint are worth a read before you buy.
Drying times, temperature and when not to paint
Not every failure is a preparation failure; conditions matter more than most people realise.
- Aim for roughly 10 to 25°C. Below about 8°C water-based paints cannot form a proper film, and oil-based paints take days rather than hours to harden.
- High humidity can double drying times: think a bathroom straight after showers or a damp autumn day. Keep gentle ventilation going, but never paint in a steamy room.
- Never paint a radiator, or the woodwork behind one, while it is hot: the heat flashes the paint off too fast and leaves drag marks.
- Outside, you need a dry surface, a dry day and no rain or heavy dew before the paint has skinned over. In spring and autumn we stop exterior gloss work by mid-afternoon so the film is dry before the evening damp arrives.
- Dry to the touch is not the same as cured. Trim paints take one to four weeks to reach full hardness, so treat fresh paintwork gently in the meantime.
Putting it all together
To recap the full sequence our painters follow when painting over gloss:
- Work out what is on there with the methylated spirits test; plan on an adhesion primer if you are going water-based over old oil gloss.
- Key the surface, either by sanding with 120 grit (finishing with 180 if it feels rough) or with a liquid deglosser, until the shine is uniformly gone.
- Degrease thoroughly with sugar soap, rinse with clean water, and let it dry fully: a couple of hours minimum, longer in cold rooms.
- Spot-prime bare wood and seal knots, then prime with undercoat or, if unsanded or switching paint types, a dedicated bonding primer. Let it dry as the tin directs.
- Apply the first thin topcoat and let it dry properly: four to six hours for water-based satinwood, overnight for oil-based.
- Denib with 240 grit, a ten-second pass to take off dust nibs, then wipe with a tack cloth.
- Apply the second thin topcoat and protect the surface while it cures.
The principles are the same for a windowsill or every door in the house. It is the same care we take on our own wooden window painting work, where the surfaces take a battering from the weather. For the broader picture on getting any surface ready, our overview of how to prepare walls for painting covers the wider prep principles too.
Common mistakes we get called in to fix
These are the failures we see most often when a repaint over gloss has gone wrong:
- Emulsion straight onto gloss. It looks fine for a fortnight, then peels off in sheets; the only fix is stripping back and starting again.
- Sanding but not degreasing, or the other way round. Skip either and the bond fails, usually as chipping around door handles and skirting edges within a couple of months.
- One thick coat instead of two thin ones. Thick oil-based coats skin over while staying soft underneath, then wrinkle; thick water-based coats sag and run on vertical surfaces.
- Recoating too early. Brushing over a coat that is touch dry but not ready drags and rolls the paint underneath, leaving a texture you cannot fix without sanding it all back.
- Closing a freshly painted door. Uncured paint sticks to the frame and tears away when it next opens (decorators call it blocking). Keep doors ajar for at least a day.
- Cheap masking tape left on for days welds itself on and pulls the new paint away. Use low-tack tape and remove it while the final coat is still slightly soft.
When to call in the professionals
There is no shame in handing over the tricky bits. Intricate woodwork, a staircase full of spindles, pre-1980 paint that might contain lead, or wanting a factory-smooth finish without brush marks are all good reasons to bring in a decorator; for that last one, a sprayed finish from our spray painters achieves a levelness no brush can match. As a rough guide, UK decorators typically charge in the region of £150 to £250 a day depending on the area, and a professional gets through preparation dramatically faster than a weekend DIYer, because preparation is most of what we do.
Our painters cover Surrey and the surrounding area, and we prep every glossy surface exactly as described here, whether it is a single front door or the woodwork in a full interior repaint, so the finish still looks sharp years down the line. If you would like a hand, we are always happy to give a free, no-pressure quote and talk through the best approach for your home.
Frequently asked questions
Can you paint over gloss without sanding?
Yes, provided you degrease thoroughly with sugar soap and use a dedicated adhesion primer designed to grip glossy surfaces. Ordinary paint applied straight over untouched gloss will peel. In practice we still recommend a quick scuff with a fine abrasive pad even under a bonding primer: it takes minutes and noticeably improves the bond on doors and skirtings that take daily knocks.
Can you paint over gloss with emulsion?
Not directly. Emulsion has very little grip of its own and will flake off untreated gloss, often within weeks. If you want a matt emulsion finish on previously glossed wood or panelling, key the surface, wash it with sugar soap, apply a water-based adhesion primer, and only then brush on the emulsion in two thin coats. Done in that order, it holds up well.
What happens if you paint over gloss without preparation?
The new paint sits on the slick surface without bonding, so it chips, scratches and peels, sometimes within days and usually within a few weeks. Failed paint can often be scraped off with a fingernail. The only remedy is to strip or sand the failed coat off and start again, which takes far longer than the preparation would have.
What is the best primer to go over gloss?
A dedicated adhesion primer, sometimes sold as a bonding primer, is the best choice over gloss. Water-based versions are low-odour and recoatable in an hour or two; shellac-based versions grip the most difficult surfaces and block stains too, though the fumes are stronger. If you have sanded the gloss back to a uniformly dull finish, a conventional undercoat also does the job well.
Can you put water-based paint over oil-based gloss?
Yes, but never directly. Water-based paint applied straight onto oil-based gloss is the most common peeling failure we see. Sand the gloss until dull, degrease with sugar soap, apply one coat of adhesion primer, and your water-based satinwood or gloss will then bond properly. With that primer in between, switching from oil to water-based is routine.
How do you tell if old paint is oil-based or water-based?
Rub a cotton wool ball dampened with methylated spirits on an inconspicuous patch for around ten seconds. If colour lifts onto the cotton or the surface softens, the paint is water-based; if nothing happens, it is oil-based. Age is another clue: white woodwork that has yellowed is almost always oil-based, and most trim painted before around 2010 will be oil.