In this article
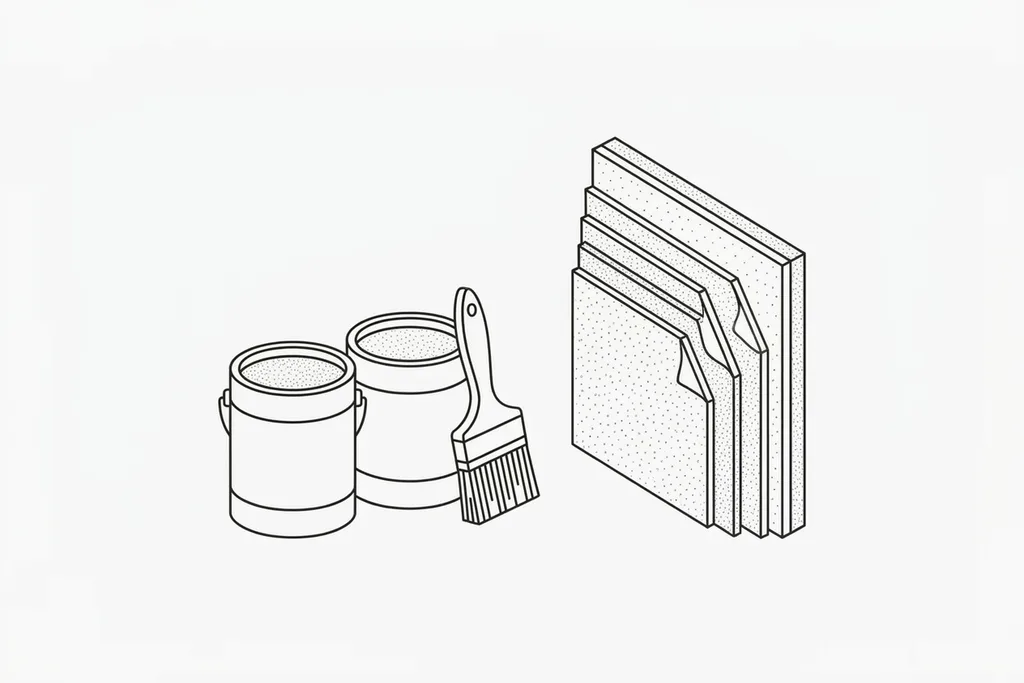
It is one of the most common questions we get asked on a job, usually while someone is stood in front of the tins in the DIY shop: is a primer the same as an undercoat, and do I really need both? The two words get used interchangeably, and plenty of products now blur the line by calling themselves a "primer undercoat". No wonder people end up confused.
The short answer is that they do two genuinely different jobs. A primer prepares and grips a surface. An undercoat builds a solid, even base for your topcoat. Sometimes you need one, sometimes the other, sometimes both, and occasionally neither. This guide explains what each one does, how our painters decide, and the system we use to get a finish that still looks right five years on.
What a Primer Actually Does
A primer is the first coat onto a bare or awkward surface, and its whole reason for existing is adhesion and sealing. It is formulated to grip something ordinary paint would struggle to bond with, and to give the coats above it a stable, consistent surface to sit on.
Depending on the surface, a primer is asked to do one or more of the following:
- Create a key so that topcoats stick rather than peel or flake away later
- Seal a porous surface such as bare plaster, timber or filler so it does not drink in your finish unevenly
- Block stains, tannins and knots in wood from bleeding up through the paint
- Protect metal from rust, or bond to a shiny, non-absorbent surface a normal coat would slide off
In practice, one coat of primer is enough on most surfaces, with a second on anything very thirsty: end grain, filler patches, or old chalky timber that swallows the first coat. Expect roughly 10 to 12 square metres per litre on smooth surfaces, noticeably less on rough or absorbent ones. Water-based acrylic primers are touch dry in around thirty minutes and recoat after two to four hours; traditional oil-based wood primers want a full sixteen hours before the next coat. On trim we apply primer with a 2 inch (50mm) synthetic brush and resist the urge to brush it out too thin: it needs enough film left on the surface to seal.
The key point is that primers are surface-specific. A wood primer, a plaster sealer, a metal primer and a stain-block are all primers, but each is built for a very different problem. Choosing the right one is half the battle, and getting it wrong is a common reason a job fails months down the line.
What an Undercoat Actually Does
An undercoat is a different animal. It is designed to go on after a primer (or over a sound, previously painted surface) and its job is to build. A good undercoat is high in pigment and body, which means it does three things a topcoat cannot do as well on its own:
- Opacity: it obliterates the colour underneath, so an old dark shade or patchy primer does not ghost through your new finish
- Build: it fills the tiny surface texture and evens everything out, giving a smooth, uniform base
- A tinted foundation: undercoats come in white, grey and other base tones, and choosing one close to your topcoat means fewer finish coats to get a solid colour
Practically, a decent undercoat covers around 14 to 16 square metres per litre. Oil-based undercoats need sixteen to twenty-four hours before you can recoat; water-based versions are ready in two to four. Whichever you use, rub the dried undercoat down lightly with 240-grit paper and dust off before the finish goes on: that quick de-nib is the difference between a topcoat that flows out like glass and one that telegraphs every speck of dust. Going from a dark colour to a pale one, plan on two coats, and consider a grey-tinted undercoat under deep topcoat colours. Our guide on how many coats of paint you actually need breaks the arithmetic down surface by surface.
Undercoat is most associated with woodwork and trim: doors, skirting, architraves and window frames painted in gloss, satinwood or eggshell. On those surfaces the topcoat is thin and designed to flow and level, so it relies on the undercoat beneath to do the heavy lifting of coverage. Skip it and you end up chasing coverage with two or three coats of expensive finish, and the result is rarely as flat or as durable.
The Key Difference in One Sentence
If you take nothing else away, take this: a primer bonds to and seals the surface, while an undercoat builds colour and body for the topcoat. Primer is grip and protection at the bottom of the system; undercoat is opacity and a smooth foundation in the middle. They are not rivals, they are two parts of the same layered system, and on a proper woodwork job you often want both.
Do You Need One, the Other, or Both?
Here is the decision our painters run through, in plain terms.
- Bare or tricky surface, plus a proper topcoat finish: you generally want both. Primer first to bond and seal, undercoat next to build, then your finish coats.
- Sound, already-painted surface in good condition: you can usually skip the primer and go straight to undercoat (or even topcoat), provided the existing paint is clean, stable and abraded with 180 to 240-grit first.
- Bare wall being emulsioned: no traditional undercoat is needed. A thinned "mist coat" of emulsion acts as the primer, and then two full coats of emulsion finish the job.
- Using a modern combined "primer undercoat": for many straightforward jobs a single well-chosen product does both roles, which we cover further down.
Whatever the surface, none of this replaces preparation. Filling, sanding and cleaning come first every time, and our guide on how to prepare walls for painting walks through the groundwork every base coat depends on.
The Full System on Bare Woodwork, Step by Step
Bare or stripped timber is where the question matters most, so here is the sequence our painters follow on a door, skirting board or window frame:
- Wash it down. Sugar soap solution, rinse, and let the timber dry fully. Paint over grease or old polish and nothing else in this list will save you.
- Treat the knots. Two thin coats of shellac knotting solution over every knot and resinous streak, about fifteen minutes drying between them.
- Sand. 120-grit to level, then 180-grit to refine, always with the grain. Vacuum off and wipe with a tack cloth: dust left in the grain is dust in your finish.
- Prime. One coat of wood primer, worked into mouldings with a 2 inch brush. End grain gets a second coat because it drinks the first.
- Fill and spot-prime. Fill dents and open joints once the primer shows them up, sand flush, and spot-prime the repairs so they do not flash through later.
- Rub down and undercoat. A light pass with 240-grit over the primer, dust off, then one coat of undercoat, or two if the colour change is dramatic.
- De-nib and finish. A whisper of 320 to 400-grit to knock off nibs, dust off, then the topcoat. On flat door faces we lay the paint on with a short-pile 4 inch mini roller and immediately lay it off with the brush, tip to toe.
It feels slow written down, but each coat goes on faster than the last, and this system is what stops a door needing repainting again in eighteen months.
Choosing by Surface: A Practical Guide
Because primers are surface-specific, the honest answer to "which do I need" is "it depends what you are painting". Here is how it breaks down for the surfaces we meet most often in Surrey homes.
Bare wood
New or stripped-back timber is thirsty and full of natural tannins, knots and resin that will bleed through a pale finish. Start with a wood primer, or knotting solution plus primer on knotty softwood, to seal it and lock those stains down. Follow with an undercoat to build, then your gloss, satin or eggshell topcoat. This full three-part system is what gives painted doors and skirting that deep, flawless look.
MDF
MDF is a special case. Cut edges are extremely absorbent and will swell and fur if you flood them with a water-based product, so they need sealing before anything else. A dedicated MDF or acrylic primer, or a solvent-based sealer on the edges, is essential. Give the edges two coats, sanding lightly with 240-grit once the first has hardened, before you prime the faces. We cover the whole process, including spraying and edge treatments, in our guide on how to paint MDF.
Metal
Metal needs a primer chosen for the job it faces. Degrease first, take ferrous metals back to sound material with a wire brush and 80-grit paper, then apply a rust-inhibiting zinc phosphate primer, two coats outdoors, to stop corrosion creeping under the paint. Galvanised steel and aluminium are shiny and non-porous and need a specialist etch or mordant primer that can actually bond to them. Get the primer right and the topcoat looks after itself; get it wrong and the whole system lifts.
New plaster and walls
Fresh plaster does not want a solvent primer or a traditional undercoat at all. It needs to breathe while it finishes curing, which can take three to four weeks for a full skim, so it is sealed with a mist coat: roughly seventy per cent matt emulsion to thirty per cent water. That thinned coat sinks in, seals the suction and gives the two full emulsion coats above it, rolled on with a medium-pile 9 to 12mm sleeve, something even to grip. Water or nicotine stains are the exception: lock those down first with a dedicated stain-blocking primer.
Over existing gloss
Old, cured gloss is smooth and slippery, and fresh paint will not key to it on its own. Either wash it with sugar soap, abrade it with 180 to 240-grit and use a bonding primer, or reach for one of the modern no-sand primers. Because this trips so many people up, we wrote a separate guide on how to paint over gloss that covers de-glossing, priming and getting a lasting bond.
Water-Based or Oil-Based?
Both primers and undercoats come in water-based and oil-based versions, and the trade has swung heavily towards water-based since the VOC regulations changed the chemistry of solvent paints. Water-based products are low-odour, recoat the same day, clean up in the sink and, crucially on white woodwork, do not yellow over time. Oil-based products still flow out a little flatter and grip weathered exterior timber well, but they hold you up overnight between coats and the whites amber noticeably within a couple of years. Our default on interior trim is now a water-based system applied with a good synthetic-filament brush, and we never put a water-based coat over an oil-based one without abrading and priming in between.
What About Combined Primer-Undercoats?
Modern "primer undercoat" and "all-in-one" products genuinely do combine both roles, and for a lot of everyday jobs they are a sensible, time-saving choice. On a sound or lightly primed surface, a quality combined product can seal, build and cover in one, and you go straight to topcoat.
Where we would still separate the two is on the harder surfaces above: very absorbent bare wood, MDF edges, bare or rusting metal, or anything with stains and knots that need genuinely blocking. On those, a purpose-made primer will always out-perform a jack-of-all-trades. A combined product is a convenience, not a cure-all, and knowing when to trust it is part of the craft.
Temperature, Humidity and Drying Times
Base coats are more sensitive to conditions than most people expect, and the times on the tin assume a warm, dry room. Our working rules: do not apply primer or undercoat below about 8 to 10 degrees Celsius or in very high humidity, because the film dries slowly, stays soft and picks up dust. Outdoors, stop early enough that the paint is touch dry before the evening dew lands. In a cold spare room in January, an oil-based undercoat that promises sixteen hours can need double that, and recoating too soon drags the coat beneath and wrinkles the finish. In summer heat the opposite bites: water-based coats flash off so fast they will not flow out, so work in smaller sections.
Common Mistakes We Get Called Out to Fix
Most paint failures we are called out to fix trace back to the base coats, not the finish. The usual culprits:
- Using an undercoat as if it were a primer on a bare surface, so nothing actually seals or bonds underneath and the film peels away in sheets a year later
- Skipping the primer on shiny gloss, glazed tile or bare metal and wondering why the topcoat can be picked off with a fingernail within months
- Flooding raw MDF edges with water-based paint and getting a swollen, furry finish no amount of extra coats will hide
- Painting a strong topcoat over no undercoat, then chasing coverage with three coats of expensive finish, brush marks building in every one
- Recoating before the previous coat has properly dried, which wrinkles or drags the film and means stripping back to start again
- Reaching for a "does everything" tin on a surface that needed a specialist primer, then watching the stains bleed straight back through
None of these look like errors in the moment. They show up later, when paint that looked perfect on day one starts to flake, flash or bleed, and the only real fix is stripping back to start again.
When to Call In a Professional
Plenty of undercoat-and-primer jobs are well within a careful DIYer's reach: a single door, a run of skirting, a bookcase. Where we would honestly say bring someone in: a full staircase with spindles, a whole house of woodwork, stains that keep bleeding back, or paintwork in a home decorated before the 1970s, where older coats may contain lead and should never be dry-sanded. A professional decorator in the South East typically charges in the region of 150 to 250 pounds a day, and a fair chunk of that buys exactly the knowledge in this article: which primer, which undercoat, in what order, so the job is done once. Our painting contractor team handles everything from single rooms to full properties.
Getting It Right First Time
Undercoat and primer are not competing products or interchangeable jargon. A primer grips and seals the surface, an undercoat builds a solid base for your finish, and the right combination depends entirely on what you are painting and the condition it is in. Match them to the surface, respect the drying times, do not skip the preparation, and your topcoat will look better and last far longer.
If you would rather not gamble on the tins, this is the detail our team handles every day. Our professional interior painters specify the correct primer and undercoat system for every surface in your home, so the finish is right the first time and stays that way through Surrey's damp winters. Get in touch for a free, no-pressure quote and we will assess your surfaces and recommend the right approach for the job.
Frequently asked questions
Is undercoat the same as primer?
No. A primer bonds to and seals a bare or difficult surface; an undercoat is a high-pigment coat that builds opacity and a smooth base over the primer. They are formulated differently: primer for adhesion and sealing, undercoat for coverage and body. Some tins combine both roles as a "primer undercoat", but a plain undercoat is not a primer and will not seal bare surfaces properly.
Do I need primer AND undercoat?
On bare wood, bare metal or any tricky surface being given a gloss, satinwood or eggshell finish, yes: primer to seal and grip, undercoat to build, then topcoat. On sound, previously painted woodwork you can usually skip the primer and use undercoat alone after a light sand. On bare plaster you need neither in the traditional sense; a thinned mist coat of emulsion does the priming job.
Can I use undercoat as primer?
No, not on a bare surface. Undercoat lacks the sealing and adhesion properties primer is built for, so on bare timber it soaks in unevenly, and on shiny or metal surfaces it simply will not grip: the whole system can peel later. The best coverage and durability come from using each product for its own job.
Do you need undercoat on already-painted wood?
Only sometimes. If the existing paint is sound, clean and you are staying in a similar colour, a light sand with 180 to 240-grit and one or two topcoats is usually enough. Use an undercoat when you are changing colour, when the old surface is patchy or repaired in places, or when switching from oil-based to water-based paint, where a primer-undercoat gives the new coat something reliable to bond to.
What primer for bare plaster?
A mist coat, not a conventional primer. Thin matt emulsion with water, roughly seventy per cent paint to thirty per cent water, and roll one coat on to seal the suction of the fresh plaster, which should cure for three to four weeks first. Avoid PVA and solvent primers, which stop the wall breathing and cause later coats to peel; only stains need a dedicated stain-blocking primer.
What is a primer-undercoat (self-undercoating paint)?
A primer-undercoat is a single product formulated to do both jobs: seal and grip like a primer while building opacity like an undercoat. On sound or lightly porous surfaces a good one saves a full coat and a day of drying, which is why the trade uses them constantly. They are weakest on extreme surfaces, such as raw MDF edges, rusty metal, heavy stains or knots, where a dedicated specialist primer still wins.