In this article
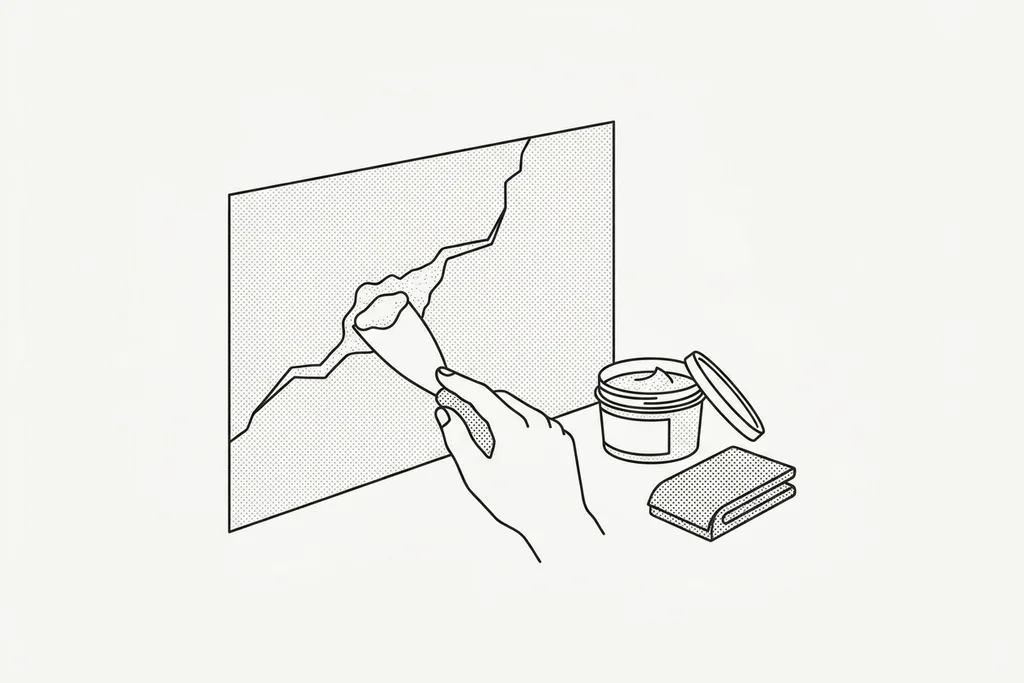
Almost every wall we paint in Surrey has a crack or two hiding under the last coat of emulsion. Most are entirely cosmetic, and once they are filled properly you will never see them again. The problem is that a badly filled crack is worse than one left alone: skimp on the preparation and it reappears within weeks, telegraphing straight through your fresh paint in a hard, glossy line that catches the light. In our experience the difference between a repair that lasts and one that fails almost always comes down to a few minutes of preparation before the filler ever touches the wall.
This guide walks through how we fill cracks in walls on a professional decorating job, from opening the crack up to priming the finished filler ready for paint. It applies whether you are patching one hairline in a bedroom or preparing a whole hallway before redecorating. Allow a day or two end to end; the drying, not the filling, sets the pace.
Why walls crack in the first place
Understanding the cause helps you choose the right fix. Most cracks in a British home are simple movement cracks: plaster and buildings expand and contract slightly as temperatures and humidity change through the year, and the surface flexes with them. Central heating adds a daily heat-and-cool cycle of its own. Older Surrey properties sit on our region's heavy London Clay, which shrinks in a dry summer and swells again in a wet winter, so a little seasonal movement is completely normal.
The usual suspects we see are hairline cracks in plaster, slightly wider cracks where a wall meets a ceiling or where different materials butt together, and cracks that open along the join between two plasterboard sheets, especially where the joint was filled without scrim tape. New-build homes crack predictably in their first eighteen months as construction moisture dries out, and a fresh skim will craze if forced dry with heating. None of these are structural, and all of them fill beautifully once you know the routine. Cracked exterior render is a separate job our exterior painting team handles with masonry fillers and flexible coatings.
Cosmetic or structural? How to tell before you fill
Before reaching for the filler, take thirty seconds to judge what you are looking at. Fill a serious structural crack and you are only hiding a problem that will get worse. As a rough guide, the following point to a cosmetic crack that is safe to fill:
- It is narrow, roughly the width of a coin's edge or less (under about 2mm), and runs a fairly short distance.
- It follows the line of a plasterboard join, a skim coat, or the edge of an old repair.
- The two sides of the crack sit flush, with no step or lip between them.
- It is not getting visibly longer or wider over the weeks.
Be more cautious, and seek advice, if a crack is wider than about 5mm, runs diagonally across a wall or through the corner of a door or window (often stepping through brickwork mortar joints), is wider at one end than the other, or comes with doors and windows that have started to stick. Cracks that keep returning in exactly the same place after being filled, or that appear alongside damp, sagging or bulging plaster, also deserve a proper look.
A simple trick we give homeowners: pencil a line across each end of the crack and date it. If the crack has not grown past your marks after two or three months, it is almost certainly seasonal movement and safe to fill; if it has, get a builder or surveyor to look before any decorating happens. Where damp is part of the picture, our guide on how to spot and treat damp is a good place to start, because filling over a damp wall will never hold.
Tools and materials you will need
Filling cracks is not a job that demands a van full of kit, but the right few tools make it far easier:
- Filling knives: a 50mm blade for pushing filler in, a 100mm or 150mm blade for striking wider repairs off flat. A stiff scraper or old chisel corner does the raking out.
- Powder filler for the main repairs, ready-mixed fine surface filler for shallow marks, and flexible decorator's caulk with a skeleton gun.
- Self-adhesive fibreglass scrim tape for cracks that follow a plasterboard joint or keep reopening.
- A dusting brush, a vacuum, and a slightly damp sponge.
- Abrasives on a sanding block: 120-grit for the bulk, 180-grit for feathering, plus a dust mask.
- A primer-sealer or watered-down emulsion to seal the filler, and dust sheets.
Step one: rake out and dust the crack
This is the step almost everyone skips, and it is the one that matters most. A hairline crack is far too narrow to hold filler, so you need to open it up slightly to give the filler something to grip. Run the corner of a scraper or filling knife tip firmly along the length of the crack, widening it to at least 2 to 3mm and slightly undercutting it so it is a touch wider below the surface than at the top; that dovetail shape locks the dried filler in mechanically. Rake out any loose, crumbling plaster until you reach a sound, solid edge on both sides.
Once it is opened up, get all the dust out. Brush along the crack with a dusting brush, then vacuum it, then wipe over with a barely damp sponge. Filler will not bond to dust, and a dusty crack is the single most common reason a repair fails. On soft, chalky old plaster we mist the crack with clean water first, which stops the surface sucking the moisture out of the filler too quickly; the lime plaster in Victorian and Edwardian Surrey homes is especially thirsty.
Step two: choose the right filler for the job
Not every crack wants the same product, and picking correctly saves you a lot of grief. As a rule of thumb:
- Powder filler (mixed with water) sets hard, sands beautifully flat and is our first choice for cracks and holes in the flat, open field of a plaster wall. Mix small batches to a smooth, stiff-peak consistency: standard powders give 20 to 30 minutes of working time and sand in about an hour, while quick-set versions go off in 10 to 20 minutes.
- Ready-mixed filler from a tub is convenient for small nicks and shallow marks, but it dries by evaporation rather than setting, so it shrinks more and should not go in deeper than about 3mm per pass. Shallow skims dry in one to two hours; anything deeper wants overnight.
- Deep-gap filler goes on up to 20mm thick in one hit without slumping, and is the right first coat for crumbly holes before a finishing filler goes over the top.
- Flexible decorator's caulk is for the moving joints, not the flat wall: where wall meets ceiling, along skirting and architrave, and in internal corners. These junctions flex, and a rigid filler will simply crack again. Caulk stays slightly elastic and moves with the building.
The classic mistake is filling the wall-to-ceiling line with hard powder filler and watching it split open within a season. Match the product to how much that spot moves, and the repair lasts. Caulk cannot be sanded, so smooth it with a wet finger while wet. It also needs patience: most tubes say paintable in one to two hours, but emulsion over caulk that has not fully cured causes fine crazing, so we leave it overnight where we can.
If a crack follows a plasterboard joint or keeps reopening along the same line, bridge it: fill as normal, bed a strip of scrim tape over the line, then feather two or three coats of filler over the tape, extending 100 to 150mm either side. The mesh spreads future movement across a wide band rather than one line.
Step three: fill in layers, not all at once
Load a little filler onto your knife and press it firmly into the crack, working across the crack rather than along it so you push filler down into the gap instead of dragging it out. Then draw the knife along the crack to strike it off nearly flush, leaving it just proud of the surface, because all fillers shrink slightly as they dry. A millimetre proud is plenty.
For anything deeper than about 5mm, resist the temptation to pack it in one go. A thick single fill dries slowly, shrinks unevenly, slumps and often cracks again in the middle. Instead, build it up in layers of no more than 5mm at a time: part-fill the crack, give it 30 to 60 minutes to firm up, then apply a second and if needed a third pass, finishing the last layer slightly proud. On deep or crumbly holes, start with a deep-gap or bonding filler for the bulk and save the fine filler for the final pass. Slower, but the repair will not sink.
Step four: sand flush and check your work
Let the filler dry fully. Powder fillers usually feel touch-dry within an hour but need longer to cure right through, and a cold room slows everything down: a fill that dries in two hours in July can take a day in an unheated January hallway. Give deep fills a good few hours or leave them overnight. Properly dry filler is uniformly pale and powders when scratched; if it is still dark in the middle or feels cool, it is not ready, and rushing clogs your abrasive and tears the filler out.
Sand the repair back flush with the wall using 120-grit to knock down the bulk, then 180-grit to feather the edges smoothly into the surrounding plaster. Wear a dust mask and work with a sanding block so you keep the surface flat rather than digging a hollow. Then run your hand over the area with your eyes shut; fingertips find ridges and dips that eyes miss. Better still, hold a torch flat against the wall so the light rakes across the surface, as your ceiling spotlights will later; it shows every flaw while it still only costs one more thin skim and a quick sand. Once you are happy, wipe away every trace of sanding dust before you go anywhere near paint. This whole process is the heart of good surface prep, and our fuller walkthrough of how to prepare walls for painting shows where crack-filling fits into a proper redecoration.
Step five: prime the filler before you paint
Here is the step that separates a professional finish from a patchy one. Dried filler is far more porous than the painted wall around it. Paint straight over it and the filler drinks in the moisture, leaving a dull, flat patch that shows through the topcoat no matter how many coats you apply. Painters call this flashing, and it is the reason so many home-filled repairs stay visible.
The fix is simple: seal every filled area first. Spot-prime the repairs with a dedicated primer-sealer or a mist coat of your emulsion thinned with 10 to 20 per cent clean water, brushed just past the edges of each repair. A mist coat dries in about an hour in a warm room; on a heavily patched wall, mist-coat the whole thing. If your cracks appeared because old paint was already lifting, it is worth reading our guide on how to fix peeling, flaking and cracking paint so the new finish has a sound surface to sit on.
Painting over the repair
With the filler sealed, paint the whole wall rather than just the patch. Paint ages on a wall, so a spot-painted repair almost always shows as a slightly different sheen or shade. Cut in the edges with a 50mm synthetic brush and roll the field with a medium-pile roller, around 9 to 12mm, which lays emulsion evenly on smooth plaster. A typical matt emulsion covers 12 to 14 square metres per litre per coat; plan two full coats over any repaired wall, recoating after two to four hours.
Conditions matter. Emulsion and filler both behave best between about 10 and 20 degrees; below 10 degrees drying stalls, and high humidity stretches every drying time in this guide, so ventilate the room. Never force-dry filler or paint with a heat gun, because rapid surface drying over a soft core causes shrink-back cracking.
Common mistakes we get called in to fix
A fair share of our prep time on Surrey jobs is spent redoing failed crack repairs. The same handful of mistakes come up again and again:
- Filling over dust. The filler sat on a layer of powder and popped out within weeks.
- Hard filler in moving joints. Powder filler along a ceiling line or skirting gap splits the first winter the heating goes on; those joints want caulk.
- Caulk on the open wall. Caulk smeared over a flat-wall crack cannot be sanded, flashes under emulsion and can craze as it cures.
- One thick fill in a deep crack. It slumps, shrinks and cracks down the middle, leaving a sunken seam under the new paint.
- No primer over the filler. The wall looks perfect until the light comes on that evening and every repair reads as a dull patch.
- Painting over hairlines without filling. Emulsion cannot bridge even a hairline crack; it reappears as soon as the film has dried, sometimes within the week.
Every one of these is cheap to avoid and tedious to put right, because fixing a failed repair means digging out the old filler and starting again.
When to call in the professionals
Filling the odd hairline is well within reach of a confident homeowner. But some jobs are worth handing over. Widespread crazing across a whole ceiling, cracks that keep coming back after a taped repair, walls so patched they need re-skimming rather than filling, or any crack you suspect might be structural are all cases where a professional eye saves you time, money and a repaint down the line. A good decorator will also blend the repair invisibly into the surrounding paintwork, the part that is genuinely hard to get right across a large wall.
Crack filling is rarely priced separately: it is part of the preparation built into a decorating quote, and a decorator's day rate in the South East typically sits between 150 and 250 pounds. Our guide to painter and decorator prices breaks down what goes into a quote so you can compare like with like.
At Surrey Painters, filling and preparing walls is simply part of every decorating job we take on, whether it is a single feature wall or a full house. If you would rather leave the raking out, the layered filling, the sanding and the flawless final coats to us, our interior painting team covers Guildford, Woking, Godalming and the surrounding area. Do get in touch through our contact page for a free, no-pressure quote, and we will happily take a look at any cracks you are unsure about before a single tin of paint is opened.
Frequently asked questions
How do you fill hairline cracks in a wall?
Open the hairline out to 2 to 3mm with the corner of a scraper, because filler cannot grip in a thinner gap. Vacuum and damp-wipe out the dust, press powder or fine surface filler across the crack with a 50mm filling knife, and leave it fractionally proud. Once dry, sand flush with 180-grit, spot-prime with thinned emulsion and repaint. Painting straight over a hairline without filling never works.
How do you fill cracks between the wall and ceiling?
Use flexible decorator's caulk, never rigid filler, because the wall-to-ceiling junction moves with the seasons and hard filler will split again. Cut the nozzle small, run a steady bead along the gap, then smooth it immediately with a damp finger or sponge, because caulk cannot be sanded later. Let it cure properly before painting, ideally overnight, as emulsion applied over uncured caulk tends to craze into fine cracks.
How do you fill deep cracks in walls?
Fill deep cracks in layers of no more than about 5mm, never in one go, because a single thick fill slumps, shrinks and cracks down the middle. Rake out and dust, then part-fill with a powder or deep-gap filler, which can go up to 20mm in one application. Let each pass firm up for 30 to 60 minutes, finish slightly proud, and leave deep fills overnight before sanding flush.
How do you fill cracks in plaster walls?
The routine is: rake out, dust off, dampen, fill, sand and prime. Widen and undercut the crack, vacuum out the dust, and mist old, thirsty plaster so it does not pull moisture from the filler. Fill with powder filler, slightly proud, and sand back through 120-grit to 180-grit once fully dry. Seal the repair with a mist coat of thinned emulsion before repainting, or it will show as a dull patch.
When is a crack in a wall serious (structural)?
Treat a crack as potentially structural if it is wider than about 5mm, runs diagonally from the corner of a door or window, steps through brickwork joints, is wider at one end than the other, or keeps growing over months. Sticking doors and windows are another warning sign. Mark the ends in pencil and check after a season; if it has grown, have a surveyor or structural engineer look before decorating.
Why do filled cracks keep coming back?
Filled cracks usually return for one of two reasons: rigid filler was used on a joint that moves, or the crack was never raked out and cleaned so the filler had nothing to grip. Moving junctions need flexible caulk, and recurring cracks on flat walls want scrim tape under the filler. If a taped repair still reopens in the same place, stop refilling and get the movement investigated.